آموزش برنامه نویسی اندروید |
آموزش Viewpager در کاتلین
سلام دوستان عزیز در این سری از آموزش برنامه نویسی اندروید (کاتلین) به آموزش Viewpager در کاتلین (kotlin) می پردازیم در این آموزش Viewpager همراه با فرگمنت پیاده سازی می شود تا بتوان راحت داده را برای صفحات مختلف Viewpager ایجاد شود در واقع فرگمنت صفحه های Viewpager ما خواهند بود با ما همراه باشید.
پیش نمایش
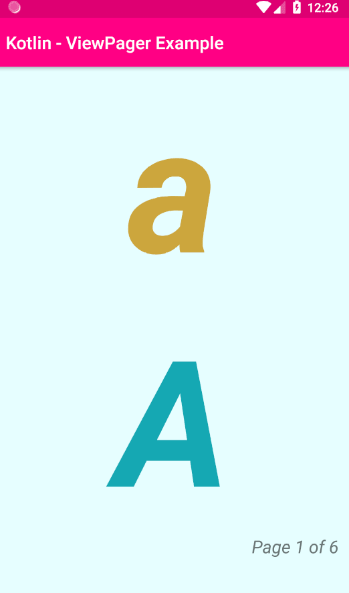
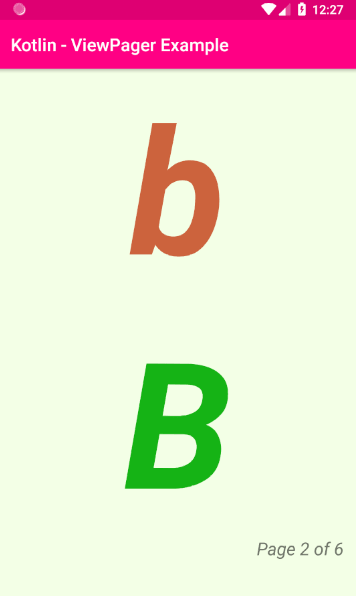
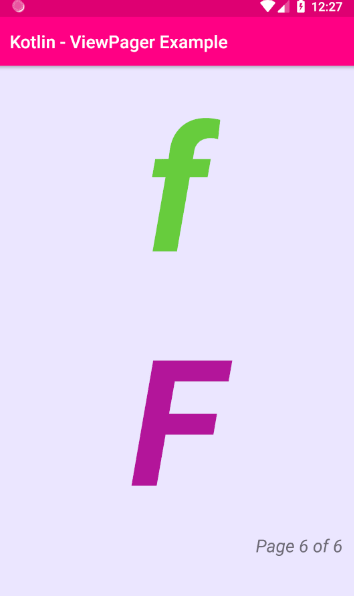
اولین کاری که باید ایجاد کنید یک لایه برای آداپتور Viewpager است در این آموزش یک آداپتور سفارشی برای viewpager ساخته می شود تا شکلی که دوست داریم را برای viewpager تنظیم کنیم.
یک فایل در بخش layout به نام page_layout.xml ایجاد کنید و کدهای زیر را قرار دهید.
<?xml version="1.0" encoding="utf-8"?>
<LinearLayout
    xmlns:android="http://schemas.android.com/apk/res/android"
    android:id="@+id/linear_layout"
    android:layout_width="match_parent"
    android:layout_height="match_parent"
    android:orientation="vertical"
    >
    <TextView
        android:id="@+id/tv_lower"
        android:layout_width="match_parent"
        android:layout_height="wrap_content"
        android:textSize="200sp"
        android:textStyle="bold|italic"
        android:gravity="center"
        android:fontFamily="sans-serif"
        />
    <TextView
        android:id="@+id/tv_upper"
        android:layout_width="match_parent"
        android:layout_height="wrap_content"
        android:textSize="200sp"
        android:textStyle="bold|italic"
        android:gravity="center"
        android:fontFamily="sans-serif"
        />
    <TextView
        android:id="@+id/tv_footer"
        android:layout_width="match_parent"
        android:layout_height="wrap_content"
        android:gravity="end|bottom"
        android:textStyle="italic"
        android:textSize="20sp"
        android:layout_marginEnd="16dp"
        />
</LinearLayout>
در بالا سه تا TextView قرار گرفته که در اولی حروف الفبای انگلیسی کوچک در دومی هم همینطور فقط حروف انگلیسی به صورت بزرگ و در آخرین Textview شماره صفحه نمایش داده خواهد شد.
حال زمان ایجاد آداپتور است یک کلاس به نام AlphabetPagerAdapter.kt ایجاد کرده و کدهای زیر را در آن قرار دهید.
import android.graphics.Color
import android.widget.TextView
import android.view.ViewGroup
import android.support.v4.view.PagerAdapter
import android.view.LayoutInflater
import android.view.View
import android.widget.LinearLayout
import java.util.*
class AlphabetPagerAdapter(private val list: List<String>) : PagerAdapter() {
    override fun isViewFromObject(v: View, `object`: Any): Boolean {
        return v === `object` as View
    }
    override fun  و(): Int {
        return list.size
    }
    override fun instantiateItem(parent: ViewGroup?, position: Int): Any {
        val view = LayoutInflater.from(parent?.context)
                .inflate(R.layout.page_layout,parent,false)
        val linearLayout:LinearLayout = view.findViewById(R.id.linear_layout)
        val tvLower: TextView = view.findViewById(R.id.tv_lower)
        val tvLUpper: TextView = view.findViewById(R.id.tv_upper)
        val tvFooter: TextView = view.findViewById(R.id.tv_footer)
        // Set the text views text
        tvLower.text = list.get(position)
        tvLUpper.text = list.get(position).toUpperCase()
        tvFooter.text = "Page ${position+1} of ${list.size}"
        // Set the text views text color
        tvLower.setTextColor(randomLightColor(70,80))
        tvLUpper.setTextColor(randomLightColor(90,70))
        // Set the layout background color
        linearLayout.setBackgroundColor(randomLightColor(10))
        // Add the view to the parent
        parent?.addView(view)
        return view
    }
    override fun destroyItem(parent: ViewGroup, position: Int, `object`: Any) {
        parent.removeView(`object` as View)
    }
    private fun randomLightColor(lightPercent:Int,blackPercent:Int=100):Int{
        val hue = Random().nextInt(361).toFloat()
        val saturation = lightPercent.toFloat()/100F
        val brightness:Float = blackPercent.toFloat()/100F
        val alpha = 255
        return Color.HSVToColor(alpha,floatArrayOf(hue,saturation,brightness))
    }
}
متد های isViewFromObject , getCount و instantiateItem مربوط به خود آداپتور است و نیاز است که تعریف شود از نام هرکدام می توان حدس زد که getCount تعداد آیتم های آداپتور را بر می گرداند isViewFromObject به منظور بررسی view بودن یا نبودن آن استفاده می شود.
instantiateItem هر آیتم را ایجاد می کند اعمال مثل find و functionality برنامه در این بخش تعریف می شود. destroyItem به منظور بهینه سازی gc باید این متد وجود داشته باشد تا اگر viewpager بیشتر از 10 صفحه داشت اتوماتیک حذف و درج آن صورت گیرید.
randomLightColor یک رنگ رندوم برای background ایجاد می کند.
حال وارد activity_main.xml شده و کدهای زیر را قرار دهید.
<?xml version="1.0" encoding="utf-8"?>
<LinearLayout
    xmlns:android="http://schemas.android.com/apk/res/android"
    xmlns:tools="http://schemas.android.com/tools"
    xmlns:app="http://schemas.android.com/apk/res-auto"
    android:id="@+id/root_layout"
    android:layout_width="match_parent"
    android:layout_height="match_parent"
    android:background="#edf9ee"
    android:orientation="vertical"
    >
    <android.support.v4.view.ViewPager
        android:id="@+id/view_pager"
        android:layout_width="match_parent"
        android:layout_height="match_parent"
        />
</LinearLayout>
در بالا یک Viewpager در صفحه قرار گرفته است.
در نهایت کد MainActivity.kt ما همانند زیر خواهد بود.
import android.support.v7.app.AppCompatActivity
import android.os.Bundle
import kotlinx.android.synthetic.main.activity_main.*
class MainActivity : AppCompatActivity() {
    override fun onCreate(savedInstanceState: Bundle?) {
        super.onCreate(savedInstanceState)
        setContentView(R.layout.activity_main)
        val alphabets = listOf("a","b","c","d","e","f")
        val adapter = AlphabetPagerAdapter(alphabets)
        view_pager.adapter = adapter
    }
}
در بالا یک لیست ساده از خروف الفبا ایجاد شده و به آداپتور پاس داده شده است و در نهایت از آن آداپتور برای Viewpager استفاده شده است.
موفق و پیروز باشید.